

How To Use Embroidery Templates
4 means to transfer embroidery patterns to fabric
Published on 27 February 2020 5 min read
Magnificent Mollie from Wild Olive is an amazing maker who tin can't aid stitching cute faces onto everything she gets her hands on! As a completely stitching guru, Mollie is our go-to gal when it comes to embroidery. This time she's helping united states of america figure out how to get our beautiful patterns onto textile, let's become started!
The most intimidating office of learning embroidery is often just figuring out how to transfer patterns to fabric, peculiarly when information technology comes to working with downloadable patterns. The good news is that you lot have lots of options to choose from and they're all easy!
Some crave special tools or materials, merely others rely on basic supplies that y'all may already have around the house. Each of these methods has its pros and cons, but the most important office is to detect ane that works for you. Endeavour these out, test them with different fabrics you lot like, and get set to start stitching!
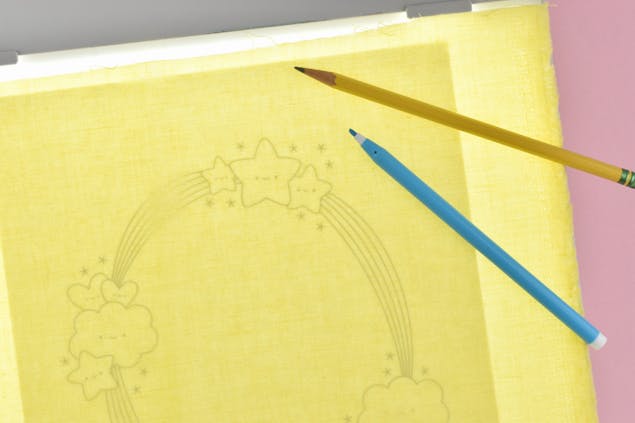
1. Lightbox
One of the simplest ways to get an embroidery pattern onto material is to trace it, and there are several ways to practise this. Most of the time you'll need a light source such as a lightbox or a brightly lit window, though some fabrics will show the design through without light. Other fabrics will nevertheless exist likewise thick or dark to use this method.
The offset step is to print the pattern. If yous are using a blueprint in a book, y'all may desire to make a copy so that lines or other elements don't show through from the reverse side. Tape the pattern to a lightbox or window so information technology doesn't shift while yous trace. Next, concord or tape the fabric over the printed design. Another way to hold the fabric taut is to place information technology in an embroidery hoop with the fabric facing astern so y'all tin trace with the wrong side of the material apartment on confronting the pattern.
Pencil or pen?
You can use 1 of several tools to trace the design. A standard, well-sharpened pencil works well and yous probably accept i on hand. For large projects that you lot'll be working on over a long menstruation of fourth dimension, y'all can likewise use an extra-fine permanent marker pen. Both of these tools create permanent lines, which means you need to trace accurately and embrace the markings with your stitches.
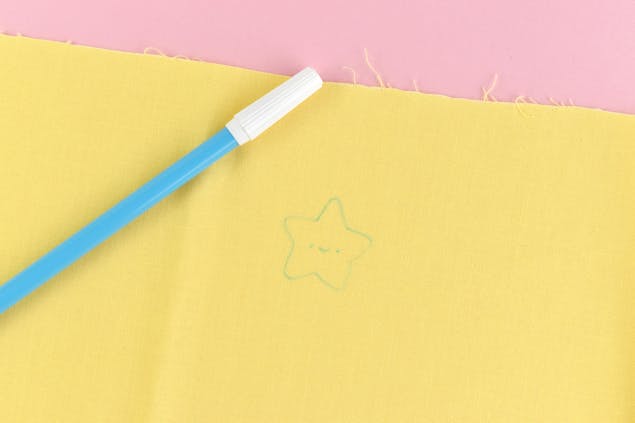
2. Disappearing ink pen
Some other tool for simple tracing is a pen or mark with vanishing ink. These markings disappear with fourth dimension, heat, or water. Those that disappear with time can be unpredictable because your lines may vanish before y'all finish or they might stick around longer than yous desire, depending on how much ink soaked into the cloth. Heat-sensitive pens are similarly unpredictable because sometimes cold temperatures tin make the markings reappear. H2o-soluble markers oft make larger lines, but they fully vanish after soaking the embroidery in h2o. The play tricks is to soak the material, instead of only rinsing it.

Clover Blue Chacopen With Eraser
By Cloverthree. Tracing paper
There are two types of tracing paper that yous can use for marking a pattern on your fabric, and both are especially helpful for fabrics that you tin't encounter through for tracing.
Fine art tracing newspaper
Lightweight tracing newspaper, often plant with children'south art supplies, makes a handy tool for stitching. Use a regular pencil and trace or describe a pattern on the paper. If you lot're working with a pattern from a book, you can trace directly from the pages.
Next, use a needle and thread to sew the paper to your material with large basting stitches. This holds the pattern in place while you run up. Embroider the pattern by post-obit the lines and stitching through both the paper and fabric. When the embroidery is finished, gently tear away the paper. It helps to tear right along the edge of the stitching, which acts as perforation for the newspaper. From there y'all can remove the pieces within the stitched areas. A pin or tweezers is helpful for removing the tiny $.25 of paper.
Embroidery tracing paper
This product uses several names including carbon paper, pattern transfer paper, and embroidery tracing paper. Information technology has a transferable powdery coating (which comes in several colours) on one side which marks the pattern on your fabric. Print your blueprint on regular paper or trace or draw it on tracing newspaper.
Place the transfer newspaper confront down on the material. Avoid pressing it downwards or moving it around too much, which tin can make marks on the fabric. Set the pattern on top of the tracing newspaper and, pressing firmly with a regular pencil or ballpoint pen, trace over the design. When yous lift the newspaper, you should see the blueprint now on the fabric. After you lot finish the embroidery, whatever stray marks volition castor or launder away.

Clover Tracing Paper Clover Chacopy
By Clover4. Water-soluble stabiliser
When you desire to embroider on dark materials or you lot simply want to start stitching in a hurry, h2o-soluble stabiliser is the perfect solution. DMC's version of this product is chosen Magic Paper and the proper noun fits considering working with it feels like magic. This production comes in both pre-printed and plain versions, which yous can impress on with your dwelling printer, making it ideal for working with digital patterns. When printing your own patterns, be sure to print in draft style, which uses less ink. You can also draw or trace patterns onto information technology with a pencil.
Requite magic paper a go with these handy kits!
-

DMC Fruit Embroidery Kit - 24cm x 16cm
5. Iron transfer
Some patterns come as pre-printed fe transfer patterns, which means you tin can transfer the designs to your textile with a quick press of the iron. An iron-transfer pen or pencil lets yous create your own transfers with whatsoever pattern. This process reverses the prototype, so you should always first with a printed pattern that has the image flipped. Using heavy tracing paper or thin copy paper, trace the blueprint with the transfer pen. The design markings will be permanent, so be sure to trace accurately.
Iron your fabric, and then place the traced (or pre-printed) blueprint face downwards on the fabric. Press the back of the paper with the iron and hold for a few seconds without moving the iron. Lift the atomic number 26. Repeat this procedure if yous take a larger design, but ever be careful not to shift the blueprint or slide the iron on the paper, which can result in blurred or doubled lines.
Cut out around the pattern pattern, so peel off the paper backing and stick it onto your fabric. Embroider through the textile and the h2o-soluble stabiliser at the aforementioned time. When y'all're finished stitching, soak the embroidery in lukewarm water. The stabiliser volition start to dissolve and float into the water. To remove the last $.25, you can hold the embroidery nether running water.
Level up your embroidery skills with these guides
-
Everything yous need to know nearly Aida, evenweave and needlework textile
v min read
-

How to frame your cross stitch and embroidery projects
4 min read
-

Ultimate embroidery stitch guide
4 min read
Shop All Embroidery Patterns

How To Use Embroidery Templates,
Source: https://www.lovecrafts.com/en-gb/c/article/4-ways-to-transfer-embroidery-patterns-to-fabric
Posted by: troupeingthe.blogspot.com
0 Response to "How To Use Embroidery Templates"
Post a Comment